Sunday, July 16, 2017

Whimsical Little Drawers

Found this little gem on a virtual yard sale site that I use called Varage Sale.  I spent a little more than I wanted to spend on it, but I am keeping it in my art room for small stuff that I don't want to lose, so I figured that paying a little more for something I want was okay.

The lady I got it from just thought that the knobs were totally the selling point.  I didn't see it that way.  Reminds me of the Saints and I am a ROLL TIDE fan, so you know those had to go.


So there it is... all nice and plain.  You know me!  I don't do plain so I had to put my own "flair" on it!


I started out with the drawers.  I removed the knobs, gave the entire piece a good scrubbing and then started painting!  I didn't really have anything specific in mind, I just did whatever came to me when I got to that drawer.


Then came the sides... I was just going to go with the streaky blended look but after I got it on there, I felt that it needed more.  So, I ended up with wildflowers on the sides.


I didn't want this one exactly like the other side, so I made it look like it was blowing in the wind.


Gotta have a little sunshine right?


I added the great knobs (remember the awesome deal on the ceramic knobs?  Yup, still have more!)


And here's the final product!  When I posted this on social media I had so many people wanted to buy it... sorry guys, not for sale.  I like it.  And it's perfect for all my small brushes and left over knobs that I have when I redo projects.  :)  Elbow grease, acrylic paint, and my favorite polycrylic sealer is all I used on this project!

Executive Desk turned Mobile Art Desk

So...mom called up and said, "I am putting this big heavy desk down by the road so if you want it, come get it!"  The problem with this HUGE, HEAVY executive desk is even though it took 3 people to get it in my mom's house, they couldn't get it out.  They tried... so, dad broke out the saw and cut it in half to get it out of the house.  The desk she gave me was much like this one.  The drawers were a little different, but other than that, it looked just like this one.  So, hubby and I jumped in the truck and off we went!
Indeed, it was cut in half, which was fine because I had my own plans for this monstrosity!  First things first... What was I to do with this thing?  Art desk!  I needed an art desk in my new art studio!  (Yup, all kids have moved out and I now have extra bedrooms to what I want with.. and I wanted an art studio.)  So... I knew I wanted it mobile because I could move it around the room and the drawers were perfect.  I needed a top and some wheels, so off to the hardware store we went!


So... I told hubby how big to cut it and so he did... I sanded it, we measured and measured again before attaching the top.  Because the wheels made it higher, to be sure it was sturdy (per hubby, I always load down everything so it has to be reinforced for my use) he attached 2x4s to the edges and then attached the wheels.  I wanted a shelf on the bottom so he attached more plywood for the bottom shelf.  You just THOUGHT it was heavy before!  LOL!


I painted it yellow (although it doesn't look all that yellow in this pic) and I did a dry brush on the entire piece except the top.  I actually coated the top a solid yellow.  I was happy!  I had a HUGE work space, 


And of course, it was just too plain!  So, I head to Pinterest for a little inspiration and found this awesome looking chair!  


Doesn't look exactly like it, but good enough!


I love to blend my colors and had such fun painting this!  I think that it turned out great!


So proud of myself! So much storage in this thing and best of all... it rolls around the room!  


Scored a huge box of these colorful awesome ceramic knobs on eBay and that was it!  


Okay... well, there is a downside to this story.  In my efforts to have a huge art desk and a big space to create, I failed to measure the most important thing... the doors!  LOL!  So... I won't be sawing anything in half!  I purposely did not fill in the screw holes with wood putty because if we decide to move, we will have to take it apart to get it out of the room!  Well, live and learn!  :-)  Still love my desk though!  It's totally awesome!

Project date: April 2017

Grandma's Old Rocker Redo

Meet Grandma's rocking chair.  Many of us grandkids were rocked in this and my mama gave it to me a while back.  It usually sat with clothes on it, collecting dust, but then... yes, then... I was gonna be a grandma!  I actually redid this back when I did the white dresser redo, so that was around Nov. 2014.  It was just before our little Toogster came into the world.  All I knew was that I wanted to redo it, brighten it up and make it pretty.


I started with a white base and thought about it for a while...


Decided I wanted to do a distressed look on it, so I went that route.  I thought I was done, but it was just too plain for me... so...


I love Cherry Blossoms, so I decided to do that!  I always get nervous when I free hand any artwork, plus it was white and I didn't want to mess up, but I think that it turned out great!


Very simple and I loved it.  But the more I looked at it, I thought it needed more distressing.


And so I did... 


Not too much, but it was just enough.  I like it and it looked great in the nursery.  So I sealed it with my favorite Polycrylic and boom!  Done!  Now she has her own room in our house and it looks just as great in there!  


Toogie's Toy Cage

Pinterest strikes again!  Yes... my daughter sent this pic to me and said, "Think dad can make this for Toogs?"  I showed it to the hubby and he said it looked simple enough, so off we went!  He went to the hardware store and picked up what he thought we needed and I started searching the web for some painting inspiration!  I couldn't just do anything plain!  That's just not me... I always have to add my flair!  Lol!  Found this great chair for my painting inspiration!


It wasn't really that hard to do... and I can't even remember exactly how many of these we got, but I think it was a couple of 2x4's and a couple of 1x1s to make the box.  We had a few pallets that he tore apart and attached to the bottom as well.


It was too big to really "hide" from her, so she decided she wanted to help too.  It's okay, she's little.   She didn't know what it was, only that we were messing with it.  It took us couple weeks to get it completely done but it turned out great!


 I was so nervous doing this, but I always am when I am free handing anything.


We were going to use bungee cords, but have you seen how much those things are?  For as many as we needed, we ended up using Marine Cord.  It stretches like bungee cord and we could buy it much cheaper than bungee cords and we paid per foot.  I think that the total cost for this project was about $30.  I had all the painting stuff, so that was for the lumber, the hooks to attached the cord to and the cord.  Not too bad for a first timer!  It's super sturdy too!


I love the paint scheme!  And Toogs loved it!  She actually gets in it sometimes and piles the stuffed animals on top of herself!  

Project date: Dec 2016

Grandma's Dresser Redo

So... As I was getting started, I thought to myself, "self... you need to snap a pic!!!"  Well, I had already taken the drawers out, but this was a set that was my grandmothers and I decided to redo this for my daughters room.  We were redecorating our old room for her and the baby (beings it was the biggest room in the house, we thought it was appropriate for her and the baby).  


I found this stain for metal that gives it "patina" and I absolutely HATE brass... I wanted to keep the original knobs because I actually like the design of the hardware.  I love this stuff!  They turned out AMAZING!


This thing was SOOOOO heavy!  But I think that it turned out great!  I did this around November 2014, and it's been through a lot (before and after the redo) and I think that I may (later) redo it in some chalk paint, but i love the stained top.  It's so pretty!

Playing catch up!

Wow!  It sure has been a while since I posted on here!  Honestly, I totally forgot that I even had this blog!!!  So much has happened over the last couple of years that kinda slowed me down on doing very many projects, but I thought that I would post a few here that I have done... there aren't that many, but I have been working on things for my own house instead of selling so much.

I decided to redo my little table and bench that I had on the carport, turned out nicely.  I did this in 2014 and it's now time to do it again.  I think that this time I may go with some brighter colors to make it "pop" more.  It's actually not even in the same place anymore, lol!  This was a simple spray paint job.  I just cleaned it good and used a spray paint that was made for outdoors.  It's lasted a while, so I am happy with it.  :)


These next few I actually did for the booth.  Just spruced up an old corkboard with some paint and covered the cork with this awesome looking fabric I found.  It didn't last long...


Now, those dang baskets on the other hand... those took a while to go.  I still think that they are pretty though.  I probably spent too much time on them really.  They were brown plain baskets and I just spray painted those with a glossy paint and added the pretty ribbons.  If I had a fire place, I would have totally used those for spring decor!


So... one of the "things that was going on" that caused my absence from here was I am now a grandma!!!  :)  Yup!  So, you know I had to do something special there!  This is a diaper cake that I attempted.  I had never done one before and it wasn't actually that hard.  It turned out BEAUTIFUL!!!  My daughter wanted a "Shabby Chic Baby Shower" so of course I was ALL IN!  This, of course, was only the tip of the iceburg!  I made every decoration (using this theme) and everything was centered around the diaper cake.  Not too "shabby" if I say so myself!


My next project was my first dresser redo attempt.  This was actually my MIL's that I decided to redo.  Hubby wanted to put it down by the road and I told him to let me redo it.  I think that it came out great for my first ever dresser redo!  This was a piece that I put in the booth simply because I didn't have room in my house for it.  Thinking back, I should have kept it.  Oh well.


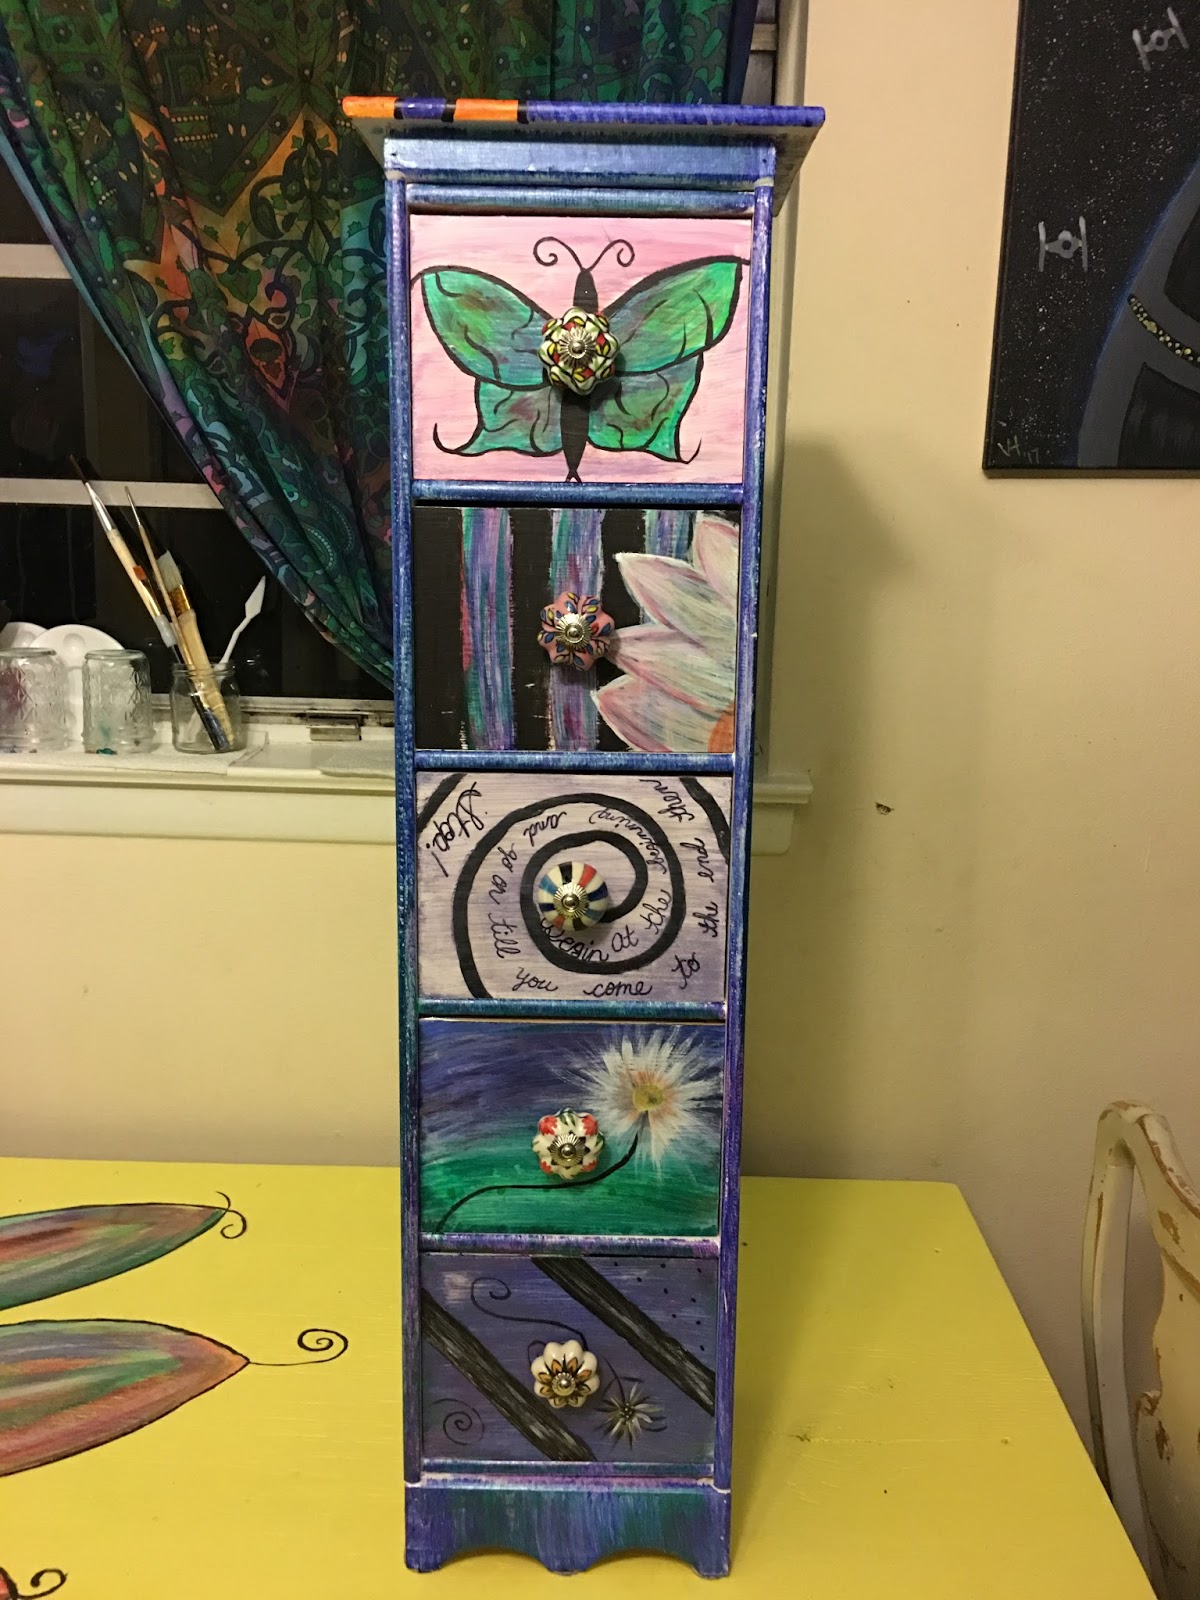
This was a little chest that my mom had in storage that I redid for my grandbaby.  I kinda cheated on this one because I was redoing a dresser set at the same time.  Of course this was during the time that I wasn't taking any "before" pics... but it was a huge transformation from what it was in the beginning.  It's actually one of my favorite pieces.  My daughter has since moved out, and of course she took this with her.  :(


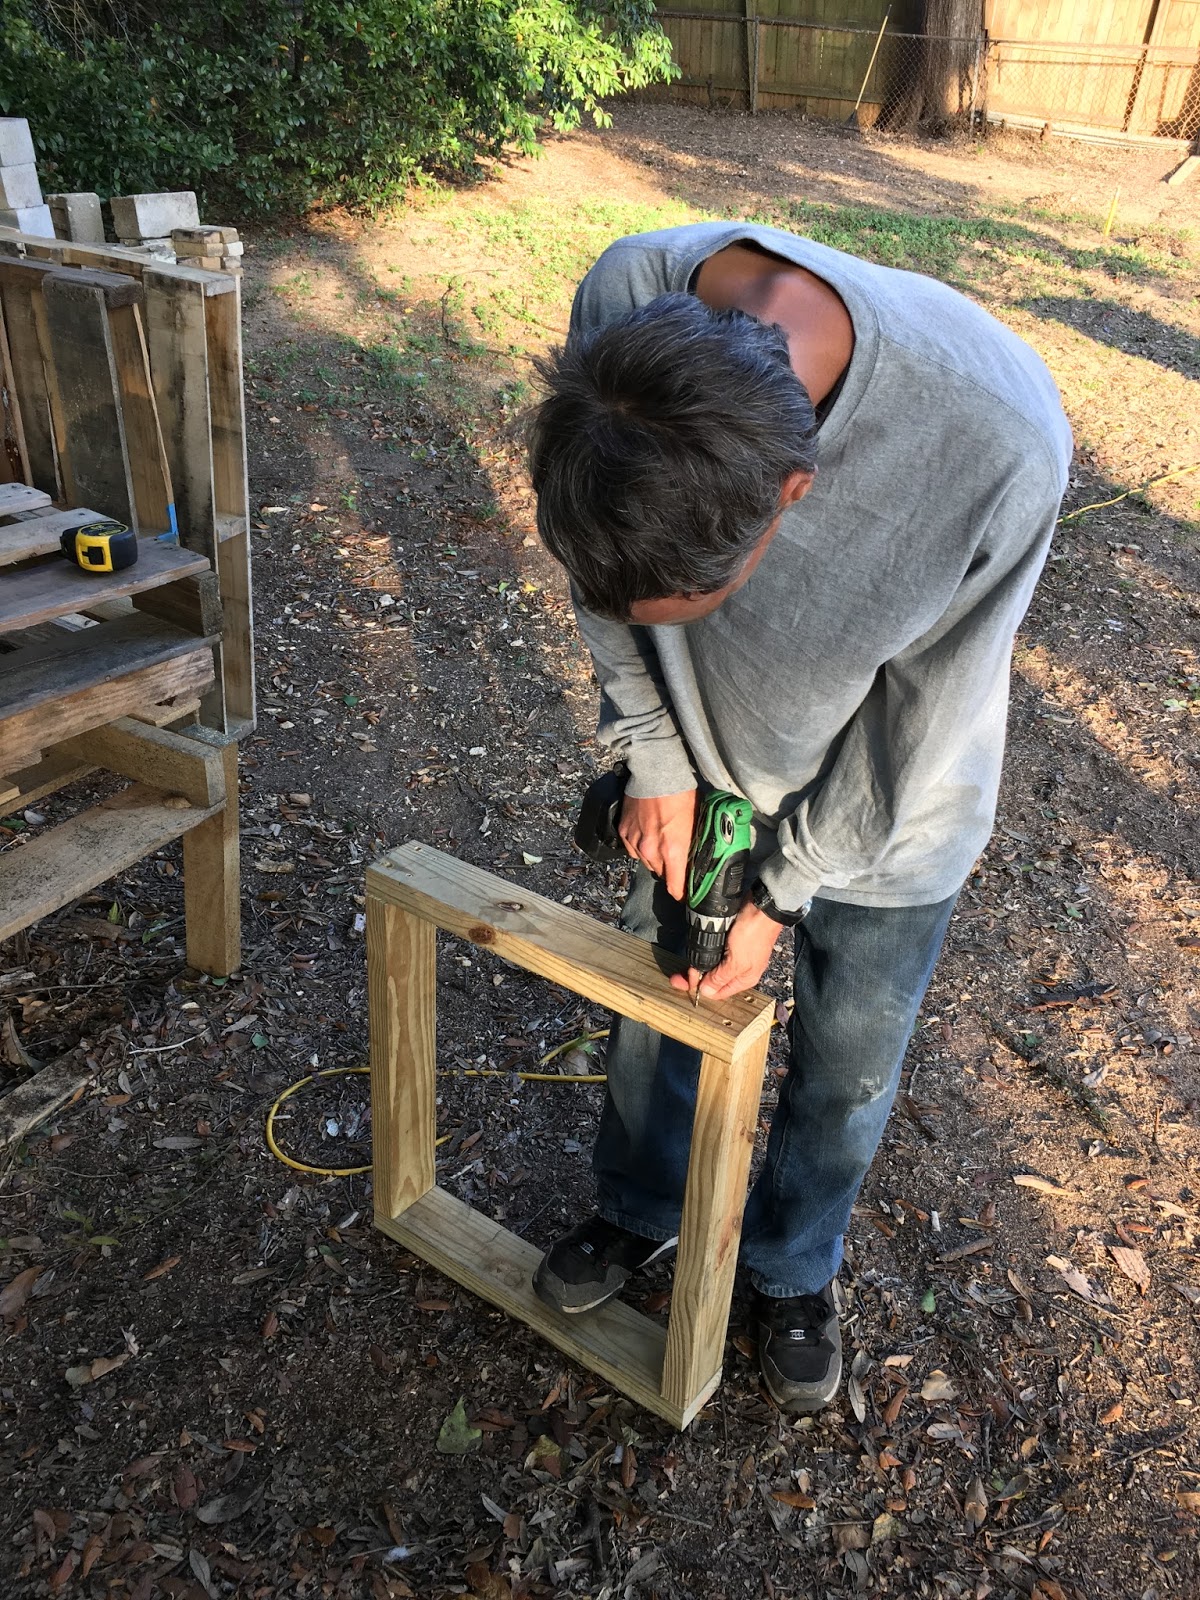
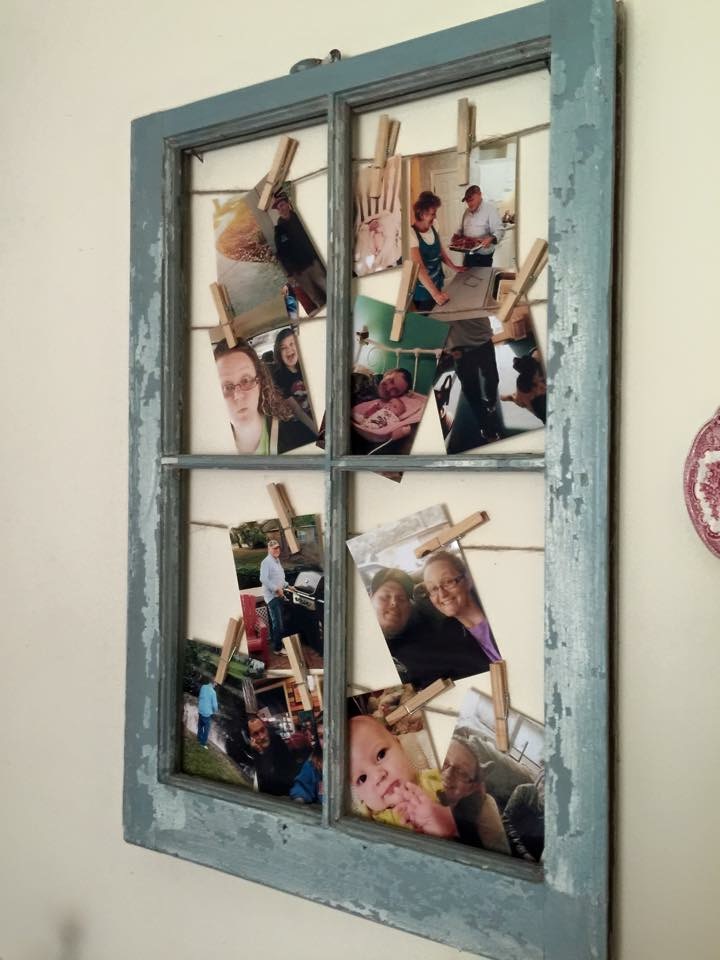
The little window that was once on the porch... I ended up redoing that and creating this... I am thinking that I am going to redo it.... yet again.  Another Pinterest idea lol!  Not bad though.


I have some more that I have done but I am going to save them for another post.  :)

Project dates:
Patio Furniture: April 2014
Bulletin Board and Baskets: 2013 (featured in earlier posts)
Diaper Cake: August 2014
Teal Dresser: October 2013
Small Tall Dresser: November 2014
Window: December 2014